How to Make a Video with Scenes in Kaiber Canvas
A step-by-step guide to building scripted videos with characters and scenes in Kaiber Canvas and Editor.
Written By Christine Larsen
Last updated 3 months ago
Making a multi-scene video in Kaiber Canvas breaks down into four stages: plan your shots, build your images, animate them, then edit everything together in Kaiber Editor.
Step 1: Break your script into shots
Before you open Canvas, work out how many scenes your video has. Each shot needs its own image. Think of it like a simple storyboard where each shot defines a moment in the story: Shot 1, Shot 2, Shot 3 and so on.
Step 2: Create or upload your base images
If you already have images of your characters drag and drop them on to your canvas or upload with the upload media button in the toolbar.
To create your characters in Cavas use Nano Banana 2 and prompt for the characters you want in your video.
Example: A young woman, early twenties, wearing a vintage band tee tucked loosely into wide-leg jeans, chunky boots, small rectangular glasses. She stands with one hand on her hip, weight shifted/ Blonde hair, composed expression, Full body, neutral background, dystopian blue-collar sci-fi aesthetic, graphic novel illustration style, warm low tungsten lighting.
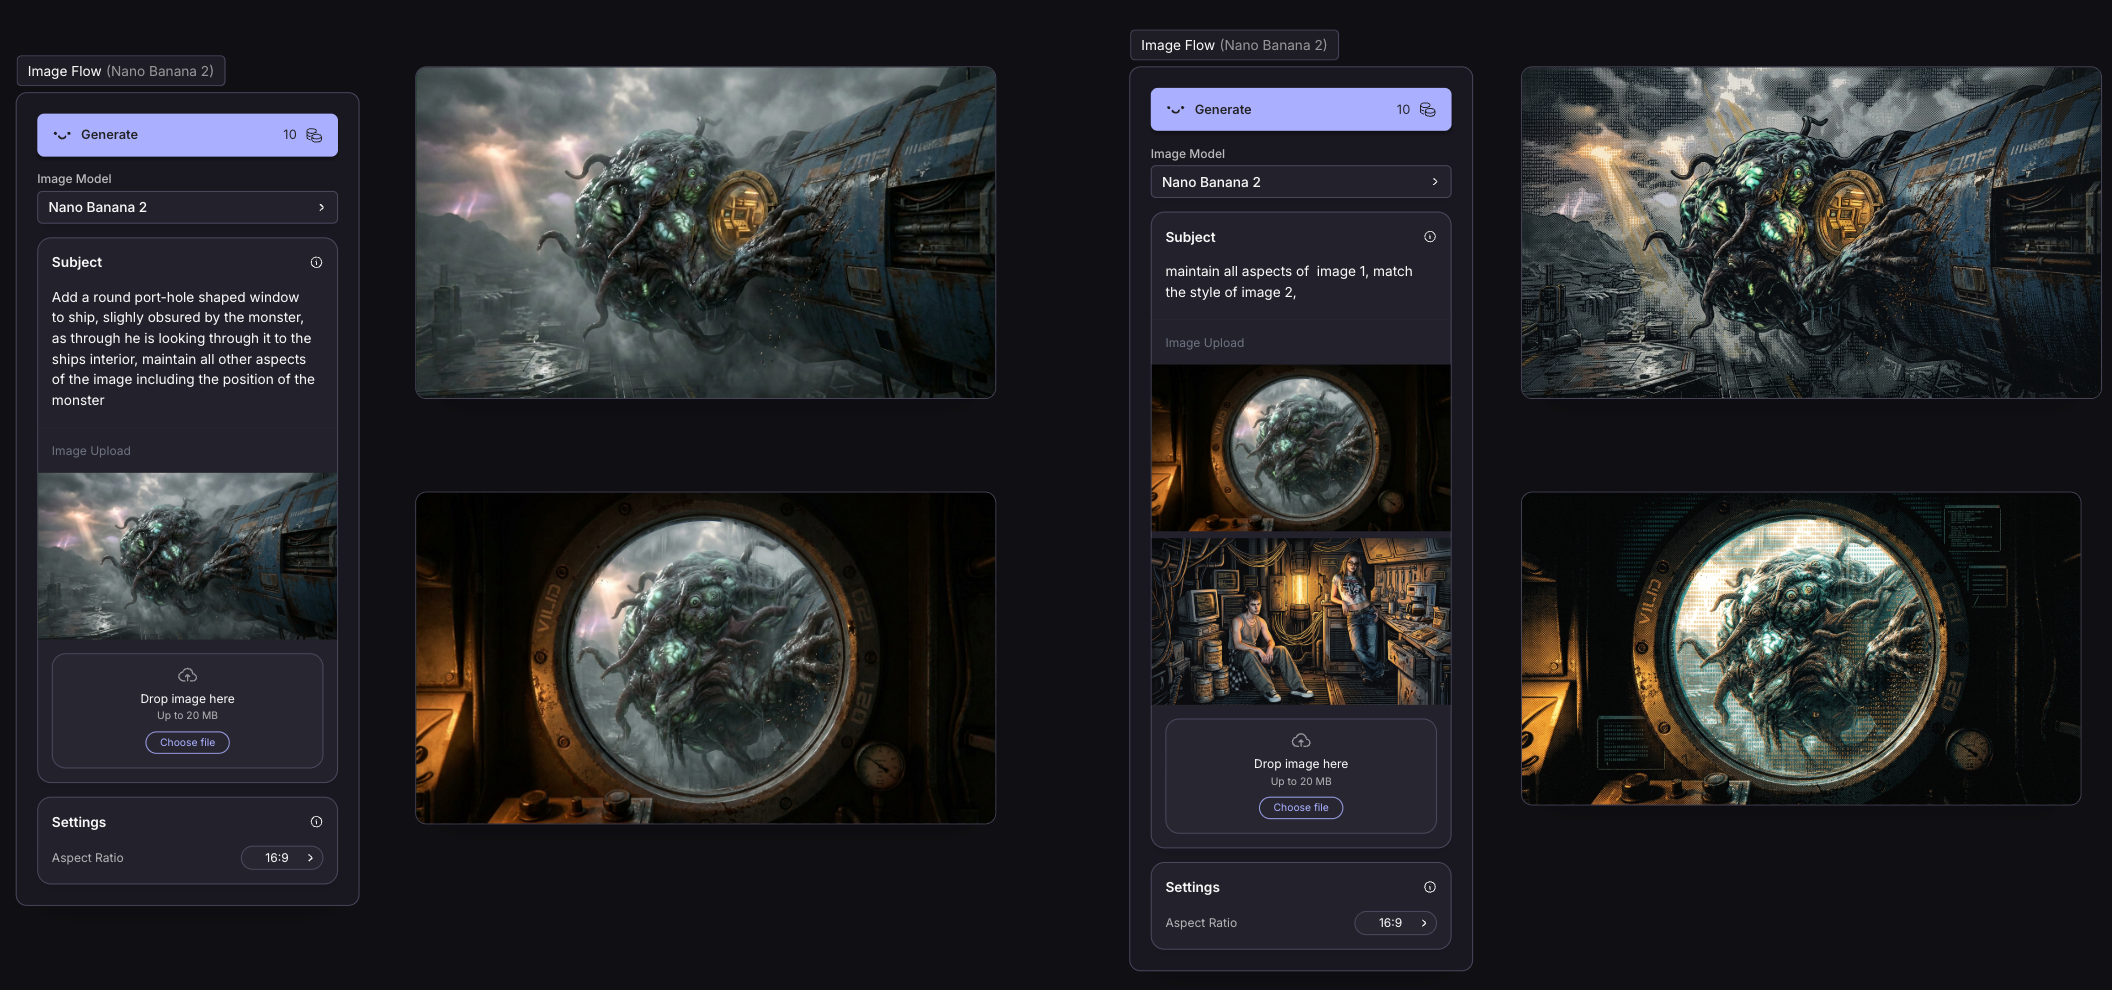
Step 3: Use Nano Banana 2 to build your scene shots
Drag and drop one or more reference images into the Nano Banana image reference field. Use prompts and additional reference images to adjust the action, setting and environment. Do this for each shot until you have one image per scene.
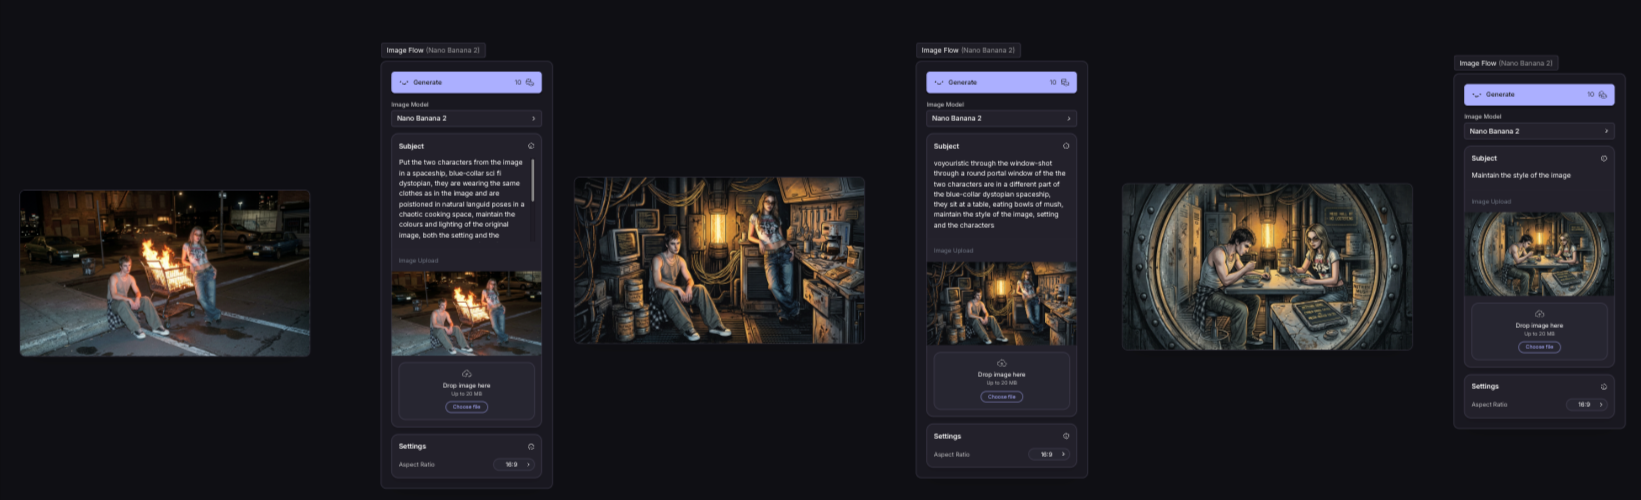
Make sure the style and aspect ratio of the image is what you want to use for the video. To restyle, use an image as a style reference, put the style in the subject box, or a combination of both.
Example: Maintain all elements and composition of image 1. Render in the style of image 2, vintage 1950s sci-fi pulp magazine illustration, flat colour, bold ink outlines, halftone print texture.
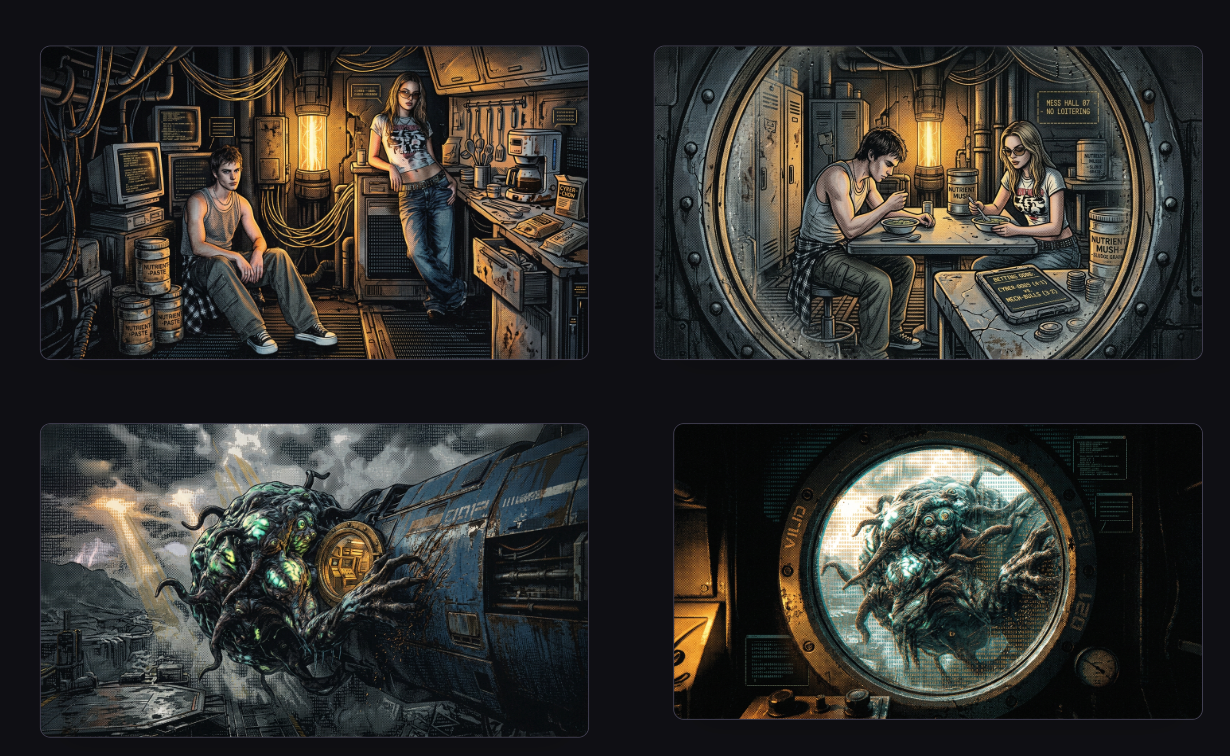
Step 4: Arrange your images as a storyboard
Lay your shot images out on the Canvas in order before you start animating. Do they have the flow and key moments that you want? Do the images start to tell a story even without movement? That’s the feel you’re going for.
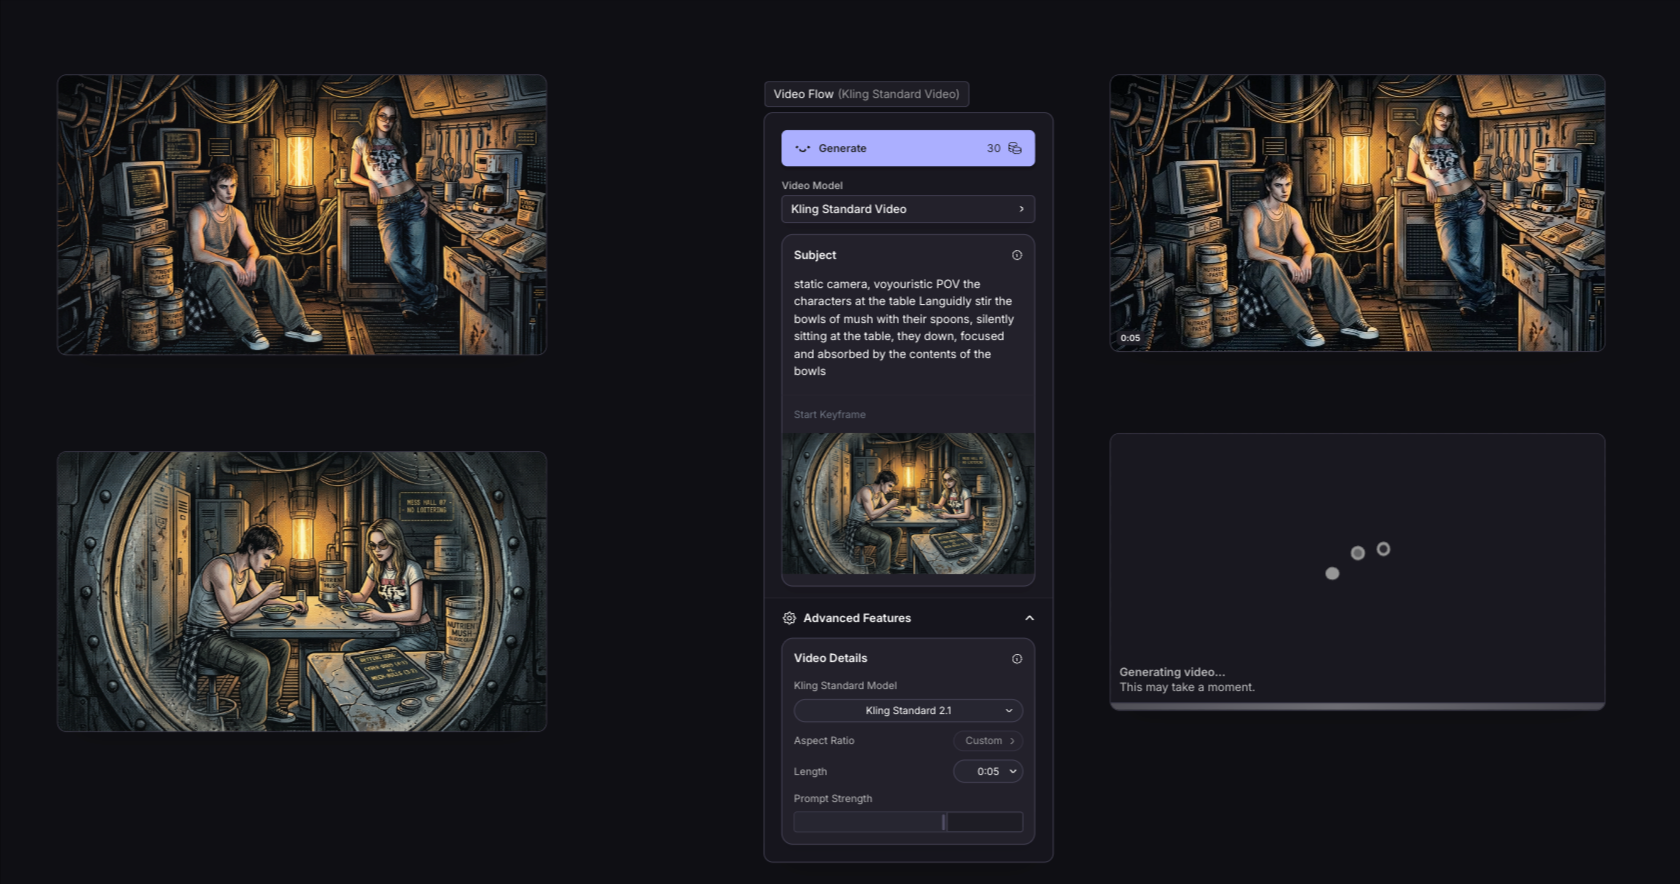
Step 5: Animate each image
Hover over an image and select the Animate Image button on the right of it.
This will add a Create Image Flow to the canvas with your image loaded in.
Type or paste your video prompt into the subject box.
Your animation prompt should only describe what's happening.
Cover these in your animation prompt:
What's moving and how
Camera behaviour
Any dialogue or speech (audio supported models only)
For most scenes, Kling 2.1 is the one to use. This will be automatically in your Animate Image Flow. If your characters are speaking or you want audio generated with the clip, use Veo 3.1.
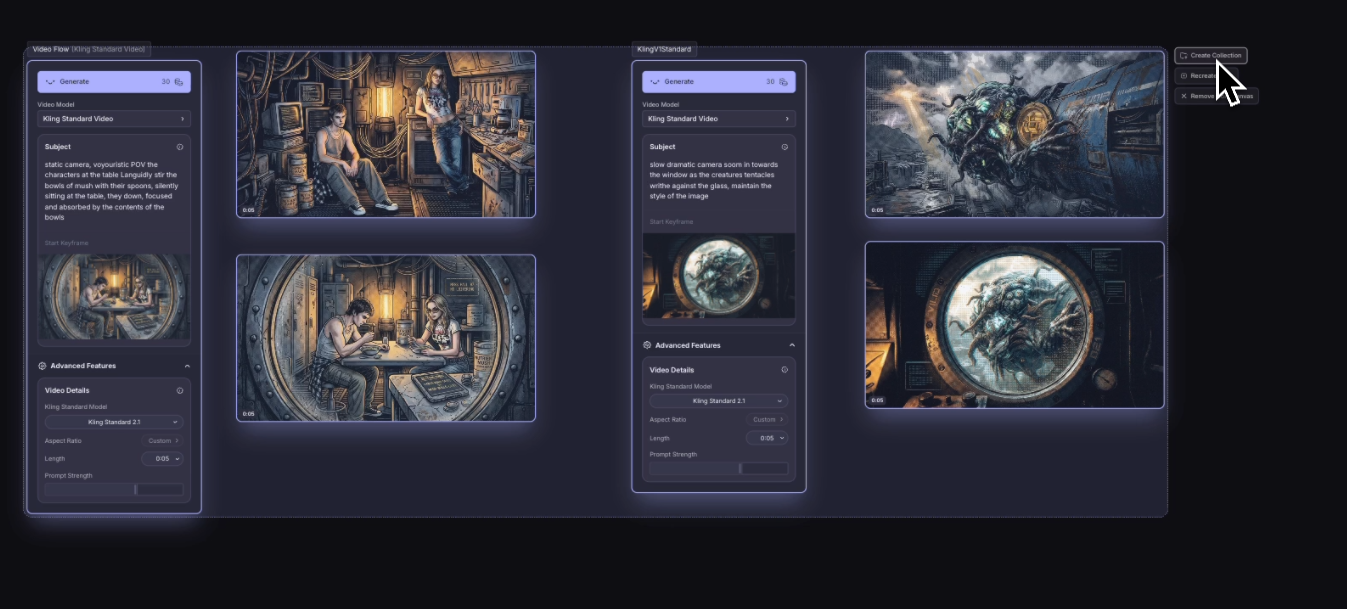
Repeat for all your images, then select the video clips and click create a collection.
Step 6: Assemble in Kaiber Editor
Once your video clips are ready, click the Home button and navigate to Kaiber Editor.
Create a new project, and drag videos from your collection in the Media Library to the timeline. Sequence your clips, add your audio, trim clips, add transitions and text overlays, and export your project.
